Relying on eCommerce product photography: It has been demonstrated repeatedly that product images drive sales. While there are many guides in the product category to share photography principles, there are unique steps you can take to optimize different types of listings.
Follow these seven steps to create high-quality furniture product images and streamline your workflow.
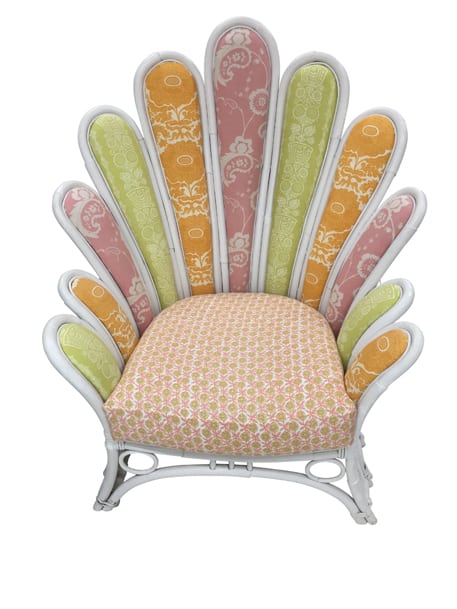
Prepare your furniture Always have your products ready. Make sure all tags are removed, the upholstery primitive and the material such as wood, leather, and metal is polished. If you need a piece assembly, allow enough time and preparation to make it. If you sell secondhand furniture, don’t hide the drawbacks. If you can’t fix these, leave scratches and other damage on the frames to allow the customer to get a correct view of your product’s condition. Accuracy increases your reputation as customer satisfaction and sales.
Before taking pictures, use furniture polish to clean your product.
On the other hand, if you have a scratch on a sample or demo that you are taking pictures of and you are selling the same piece, post-production can eliminate the imperfections. In this case, it is ethical and worthwhile because the imperfection in the product your customer is receiving will not actually be present.
Set up your studio. Choose a large place with room to work as your studio. You don’t want to be crowded when dealing with furniture and accessories like furniture.
In some lucky cases, your space will have enough natural light from the windows. In most cases, you need artificial lighting to complement what is already there.
If you are unsure where to start, lighting equipment and techniques, read our guide to DIY product photography lighting equipment.
Use an unobtrusive white paper, a sheet or a white backdrop like a wall on it.
If possible, use a seamless white backdrop. By “seamless” I mean a curved background with no crease to create shadows. You can use paper or white fabric such as sheets as your backdrop; A pinch, a wall will do.
Before taking pictures, use furniture polish to clean your product.
Select your lens
Choosing the right lens for your camera is critical because you do not want to distort your furniture in any way. In this situation, you should clear any macros or wide-angles. Generally, a versatile lens can be in the range of 50mm-75mm; This will allow for minimal deformation.
A 50mm-75mm lens or a zoom lens is effective for product photography.
There are great prime lenses that will work, but keep in mind that you need space to go with a prime lens. With a zoom lens, like the 24mm-70mm, you have the ability to zoom in and out of the frame in a small area. Remember to keep your aperture above f8 and ideally at f16, so your furniture is in full focus.
Although we recommend using a professional-grade camera and lens, it is possible to shoot with a camera in your pocket. Smartphones are packed with high-quality cameras and allow shooting on the go: Check out this guide to shooting fast, efficient, and budget-friendly furniture photography with your phone.
Position your tripod and camera
It is very important to use a tripod when photographing furniture or any fixed-life product. A tripod stabilizes your camera and ensures continuity from shot to shot, as well as removing camera shake and allowing you to customize settings.
Set your tripod directly to the front of your product and place the camera so slightly down toward your product.
If you shoot at it without having to shoot it directly, you will not be able to see important aspects of the seat or the back.
Don’t over-style it
While it may look nice and fun when you style your furnishings, it is usually a mistake. Your customer may not like the way you style your piece, and in most cases, it is any confusion or privacy that your customer wants to see.
Shoot multiple angles
Show your customers the product as much as possible. Don’t take a picture and leave it as a call; Attract their attention. Photographs from multiple angles, and zoom in on details. Get into the habit of taking pictures in front, back, on each side and at 45-degree angles.
The more product images the more sales it produces
Add detailed illustrations to highlight the specific aspects that make your furniture look unique to you and are appealing to your customers, such as fabric patterns, woodwork, etchings, and engraving.
The more angles and details you can display in your furniture, the more confident the customer will be when making a purchase decision.
Highlight details and areas of interest to customers in it
Optimization in post-production
During the post-production after your furniture is photographed. In a program like Photoshop, some polish will go a long way to improve the quality of your image and present your product optimally.
Remove dust, fingerprints, and other marks that are not part of your product part Soft highlights made by strobe lights when shooting reflective materials like metal. Highlights are indispensable when firing large pieces, but softening them and opening the shadows will make them even clearer. Don’t get rid of all the contrast, highlights, and shadows, as they help your customer visualize the material in your furniture.
Make your product image perfect in Photoshop
You can add shades to the basis of your product. Natural, drop, or reflective shades can have a subtle effect on creating realistic depth without confusing your customers. Learn how to read this guide for using shades with the furniture.
At the end
Document the steps you took during your shoot, so you can easily repeat the furniture the next time you take a picture. The lens you use, the distance between your tripod and the product, the steps you take in post-production, and other details will help you maintain consistency from product to product.